
Halloween is upon us and what better way to get in the spooky mood than with these scarily realistic witch’s fingers by Angie Johnson, aka Mrs Bun The Baker…
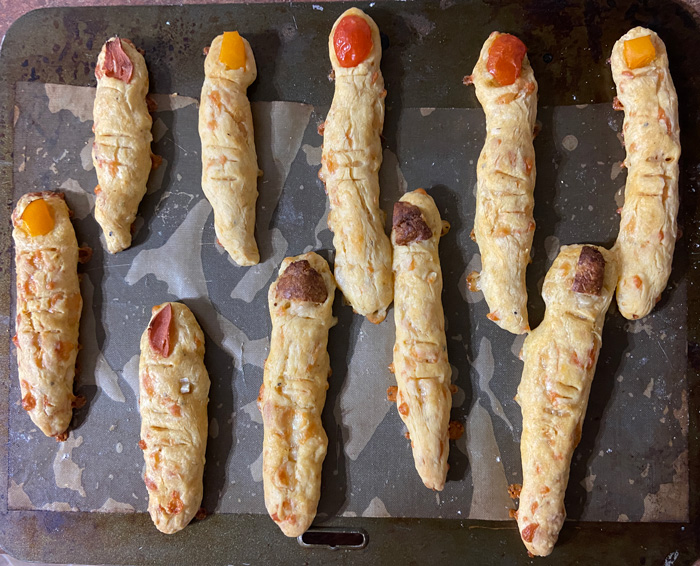
Witch's fingers
Realistic and scary pastry fingers to spruce up Halloween
Ingredients
- 110 g gluten-free flour
- 1 tsp xanthan gum
- 75 g butter or hard margarine leave in the fridge until needed.
- 75 g cheese grated (use a strong cheese for good flavour)
- 2-3 tbsp milk
- 1-2 tsp green pesto optional
- salt and freshly ground black pepper
Instructions
-
NAIL IDEAS:
Cocktail Sausages: Chop sausages into rounds or cut them down the middle, for long nails!
Peppers: If you can get all colours of peppers, you can create a rainbow of nails, cut long or short triangles from the pepper and have really pointed nails!
Pepperoni: Brown spotty nails here we come! Tear the pepperoni up and the nails will look all jaggedy, may be the witch has been nibbling those nails!
Tomatoes: Cut baby plum or cherry tomatoes in half and create red squashy nails on top!
-
Preheat the oven to 190C/Gas Mark 5 and line a baking tray with greaseproof paper.
-
Place the flour into a bowl. Chop the butter into cubes and add it to the flour. Pick up some flour and butter and rub it between your fingertips. Keep rubbing the mixture between your fingertips until it starts to look like breadcrumbs. Add the grated cheese and season to taste.
-
Mix the teaspoons of pesto (if using) into the milk and mix well. Add this milk to the cheesy mixture and mix well with a spoon until it forms a soft ball.
-
TIP: Always add liquid slowly-you can always add more if needed. Adding too much is hard to correct. Add a little more milk if it is not sticking together.
-
Give the ball of dough a good squeeze (if it is too wet, it will be too soft to make fingers). Cut the dough in half, then each half into 5 pieces. You now have 10 pieces in total. Each half is a hand! Sprinkle the worktop with a little flour.
-
Take a piece of dough between your palm, roll it up and down to create a sausage shape. Roll all the pieces into 8 finger shapes and 2 thumbs, so you have 2 hands! Or all fingers!
TIP: They don’t have to be all straight and the same size, you can have some short, long, bendy, nobbily, be an artist!
-
Place them on a baking tray, a little apart as they spread. Place your chosen nails near the top of each finger. Press it down a little, so it doesn’t pop out whilst baking. Make markings with a spoon on the fingers for the knuckles. Bake in the preheated oven for 15-18 minutes. Remove from the oven, leave to cool for a couple of minutes, and then transfer to a cooling rack.
-
VARIATIONS: Flavour the mix with a sprinkle of paprika. Add bits of spring onions or pepper to make warts on the fingers. Add fresh herbs: parsley, chives to make green speckled fingers.